As we talked in a previous article, it is difficult for me to get good leads for drawing in the local stores, I have
used a procedure to get leads easily. If I have access to good drawing
wood cased pencils, then I already have graphite leads available, i just
have to take off the wood case. It also enable me to get a wider range
of degrees to work with using lead holders,
So we will describe how to get get the leads from the pencils.
Before you buy a pencil, make sure that the pencil lead is about 2mm in diameter, otherwise the lead holder may not be able to use that lead.

What you need: a pencil and a sharp utility knife
WARNING: Be very careful with the knife!!! It is very sharp and cuts through skin easily. Never use too much force to cut with it, to minimize possible accidents.
So we would start to carve the top of the pencil with the knife. Put the end of the pencil on the paper and with the knife start to carefully carve sections of the wood of the pencil, with vertical top-down movements.

The first cut

The top end of the pencil carved
After carving the top end of the pencil, we will proceed with carving the other end of the pencil.So now we put the tip of the pencil on the paper in a vertical position and again carve form top to bottom in the paper direction.

Now start with the other end

The pencil with the top and bottom carved


Detailed views
Always use an outward movement when carving, from inside to outside, so to avoid any incident that may arise from the knife movement. Use little force to cut the wood, never force it too deep, or it may break the lead. In this case move the knife back, rotate the pencil and start carving in another place.

Now carve the middle section of the pencil with the same soft smooth knife movement. It should be easier cause we already carved the top and bottom end of the pencil.

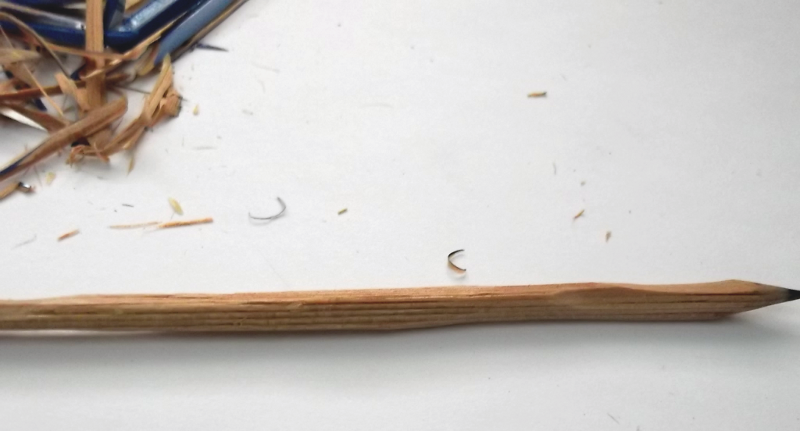
First phase completed, most of the wood has been removed
Now on the second phase we will remove most of the wood from the lead. Using the same approach as the first phase we will carve the top, then the bottom and then the middle section.


Almost finished
So now, in the last phase, it is a matter of time until you take away all the little remains of wood in the lead. With very smooth and soft little cuts refine the lead until it has no wood. Try not to cut the graphite lead, You may use the back of the knife instead of the cutting edge so to minimize the cuts in the lead.

As you can see the closer to the lead, the littler the wood cuts


Almost finished
As a final step, you can roll the final lead on a sheet of paper to clean the lead of possible remains.

The final lead


Close view of the final lead
Now we have a new graphite lead of the required degree, 2B in this case, But the lead size is bigger than what the lead holder can use, so we break the lead in halves and use one in the lead holder and the other is tagged and saved for future use.
 Too big for the lead holder
Two half's of the original lead

One Half is ready to use and the other is tagged and saved for future use.
So all; it took was 10 minutes and voila!, we have 2 new leads to draw with the lead holder!
Do not throw away the bigger wood chops from the first phase, cause i think they can be used to make some little charcoal sticks. ;-)
Enjoy drawing!!
No comments:
Post a Comment